

- Docs
- Get started
- Leads Page
Leads Page
Overview
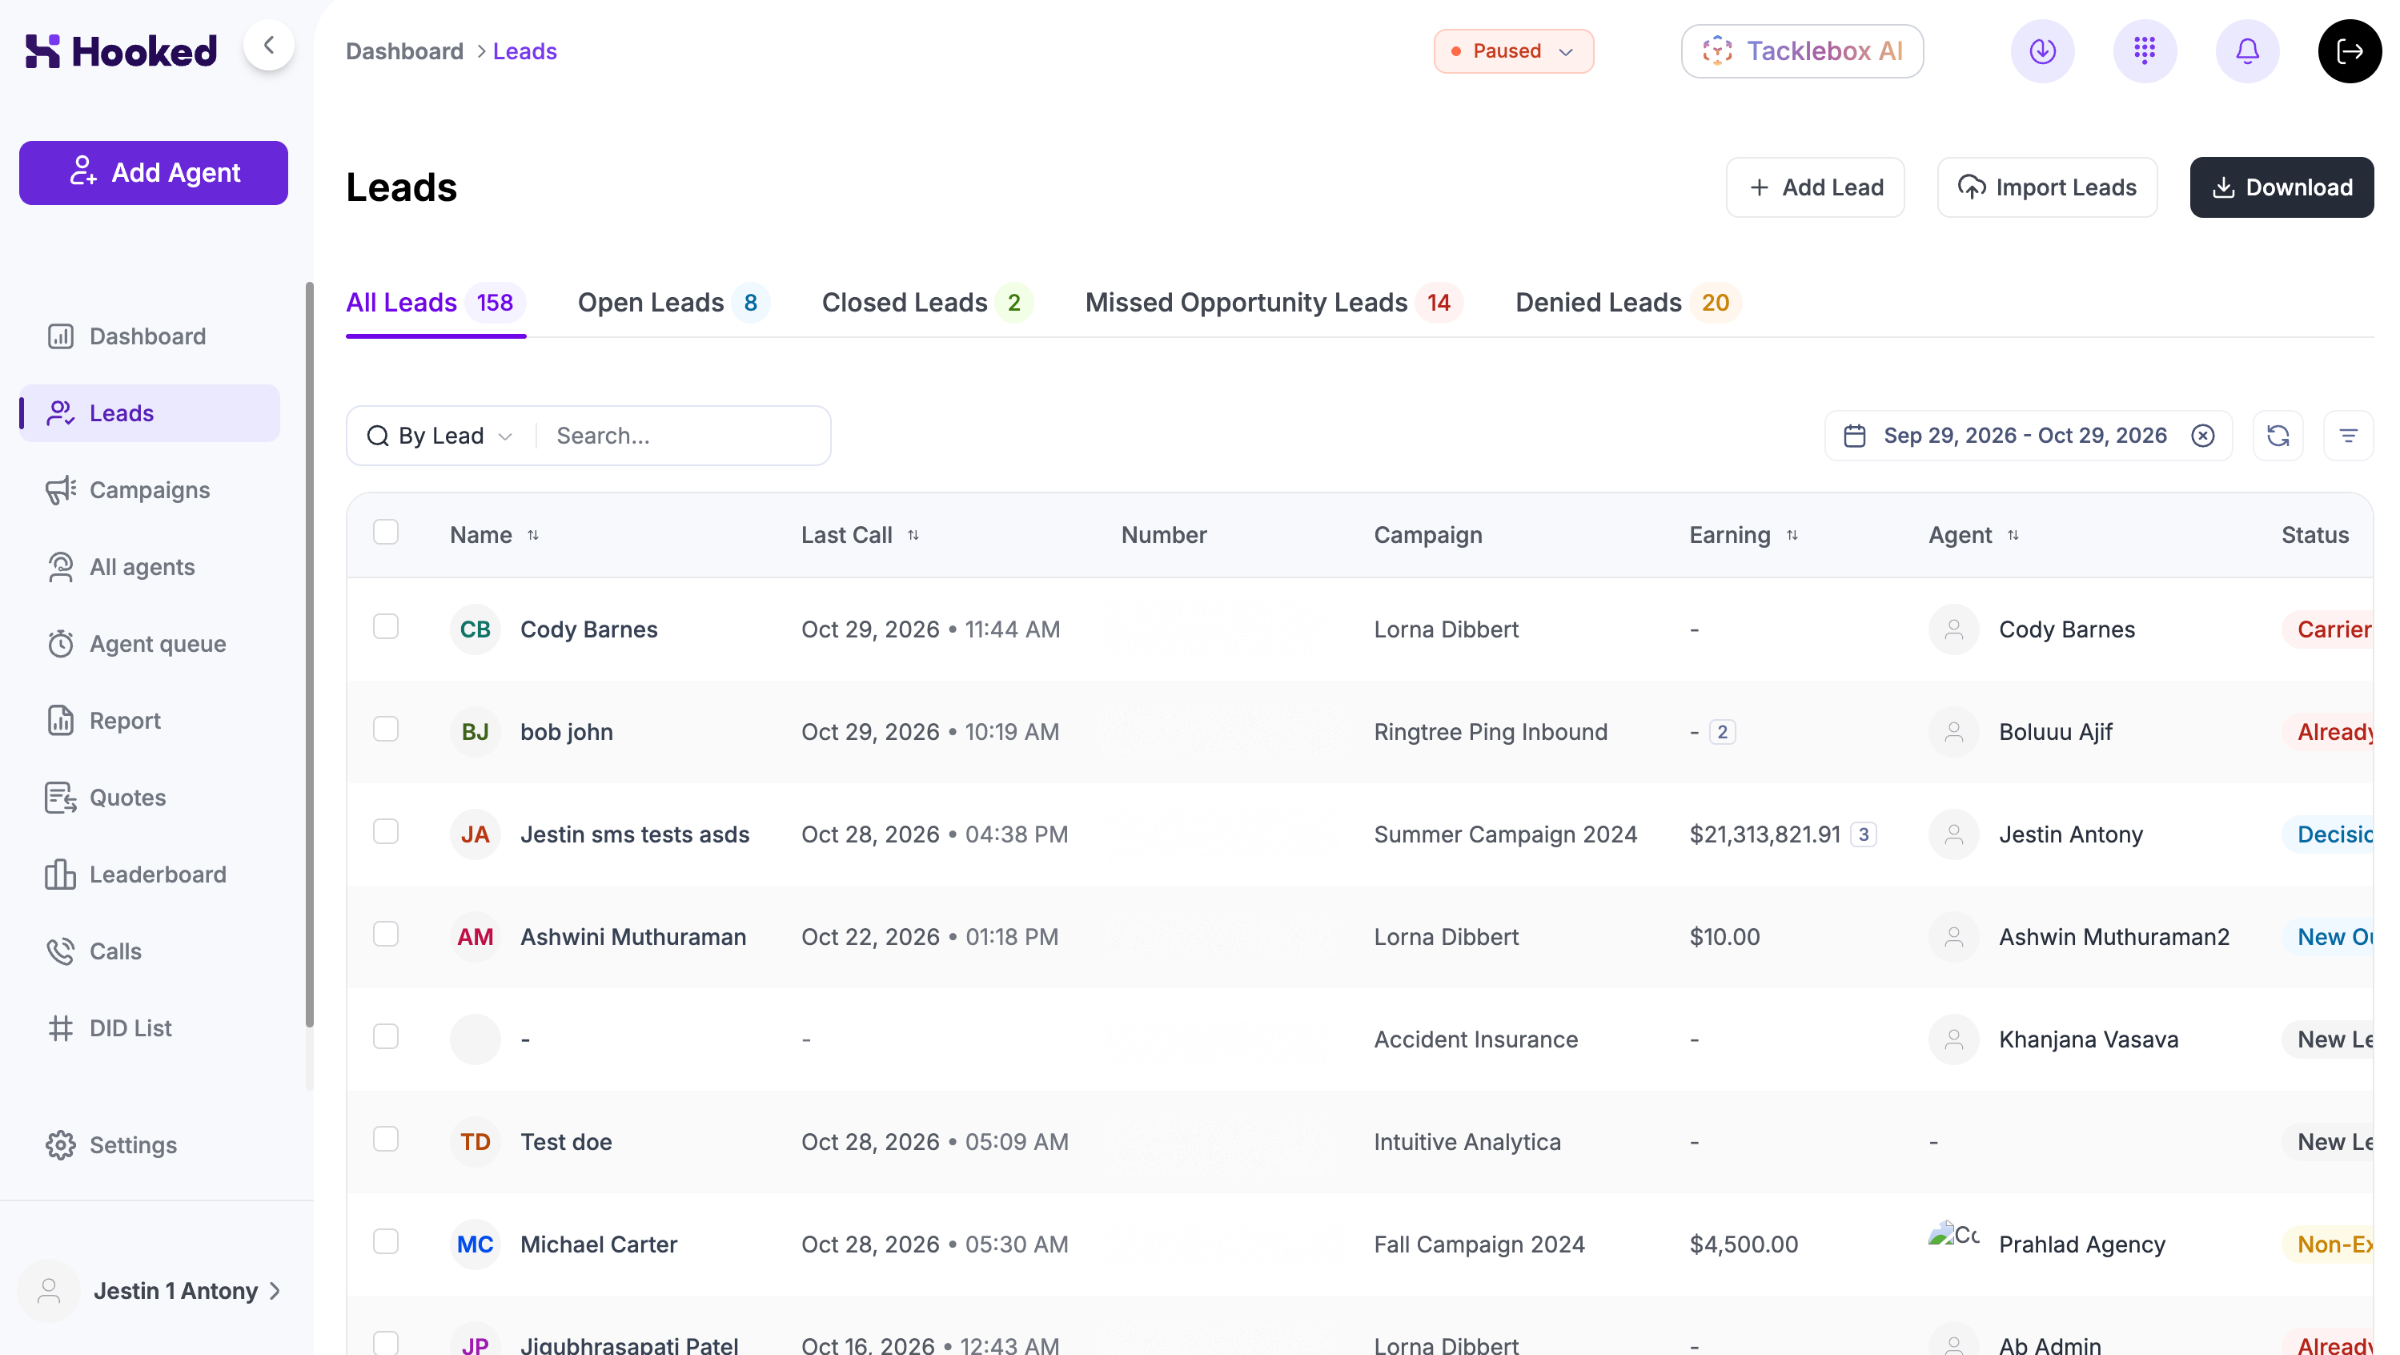
The Leads Page houses all your lead information and lets you know which you should prioritize.
Navigating the Leads Page
By default, the Leads Page will display the leads you’ve contacted within the last month. It will also provide you with the basic information for each lead:
Name: The name of the lead
Last Call: The last time you had contact with the lead via phone
Number: Client’s phone number
Campaign: States where the lead came from
Earning: How much the agent earned through the lead
Agent: The agent assigned to the lead
Status: Where the lead is within your workflow
Actions: The next action the agent needs to take
By clicking on the column name, you can reorder your leads in that order. These can be ordered in ascending or descending order by clicking on the column multiple times.
Filtering Your Leads
There are a few ways to filter through your leads: editing the current filters, adjusting the dates, and organizing by lead status.
You can adjust the display by clicking on Filter on the top right of the chart. You can rearrange the order of the chart and omit the ones you aren’t focusing on.
By clicking Dates next to Filter, you can adjust the leads by when they were contacted. We’ve also provided presets to quickly update the display.
The Status tabs are at the top of the Leads Page. Clicking the different tabs can display that category. Currently, you can display “All Leads”, “Open Leads”, “Closed Leads”, “Missed Opportunity Leads”, and “Denied Leads”.
Adding a New Lead
If you have Tacklebox AI, Hooked CRM should automatically update your Leads Page, but you can manually upload leads on the Leads Page. Click Add Lead to be brought to the New Leads page.
You can also import leads by uploading a .CSV file. You will need to format the file properly, so download the CSV template and adjust it. Once you’ve prepared it properly, click the Import Leads button and either click to upload the file or drag and drop it onto the page.
For more information, check our Importing Leads page.
Downloading Your Leads
If you need to evaluate your leads through a separate program, you can download your lead information by clicking on the Download button at the top right of the page. This will import a .CSV file to your device.
Calling Leads From the Leads Page
You can quickly call your leads through the Leads Page by clicking on the Phone Icon under the Actions column.
For more information, review the Making Calls Support Page.
Viewing the Contact Page
While the Leads Page provides the basic information you need at a glance, detailed notes and information are housed in the Contact Page. You can get to the Contact Page by clicking on…
The Lead’s Name
The Eyeball Icon under the Actions column
This is just one of the ways you can get to the Contact Page.
Creating an Event via the Leads Page
You can create an event with a Lead by clicking on the three dots under the Actions column. Once clicked, it opens a sub-menu where you can Create Event by clicking on the appropriate option.
From here, a pop-up will appear on the page where you can adjust the date, event name, and duration. You will also have the option to add a lead to the event and write some notes for yourself. To add it to the calendar, just click on Save event.
For more information on creating events, review the Calendar information.
Merging & Deleting Leads via the Leads Page
Merging and deleting leads is simple from the Leads Page. Simply click the three dots under the Actions column, and you will find the Merge Lead and Delete Lead options.
When you click Merge Lead, a pop-up will appear, and you can choose the contact to merge with.
The Delete Lead button will display a pop-up asking if you’re sure. Once confirmed, the Lead will disappear from your Leads Page.
Some of these options may be restricted to your account based on your status. If you can't make those adjustments, contact your manager or supervisors.
Adding to the DNC and Blacklist
The DNC and Blacklist were created to warn and block incoming calls that have led to aggressive confrontations and non-committal interactions.
By clicking on those options in the Actions column, you can add that contact to the Do Not Contact list or Blacklist.